Wonderfully Wonka

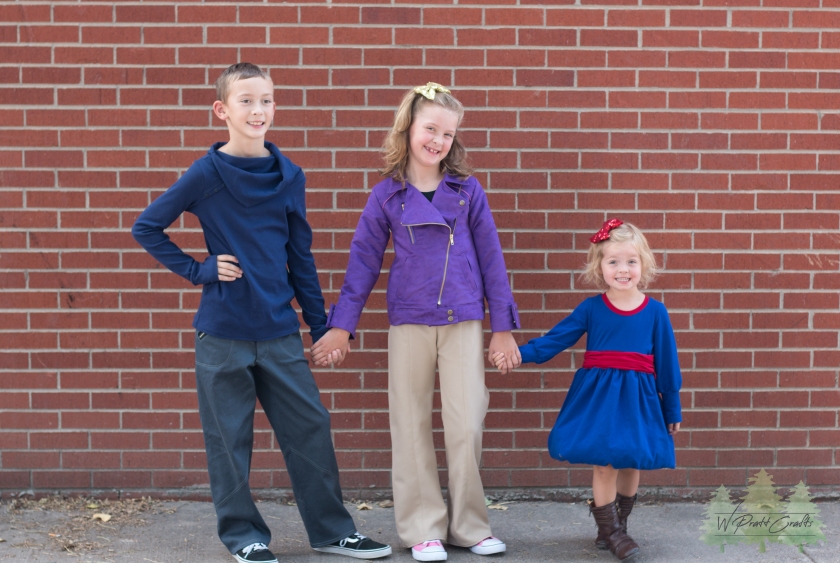
Welcome to our Wonderfully Wonka look as part of our first week over at Project Run and Play, Season 17! We had so much fun putting this look together, and we *may* still be on a sugar high, but without further ado, here is our modern trio of Wonka kids.

Wonderfully Wonka Title

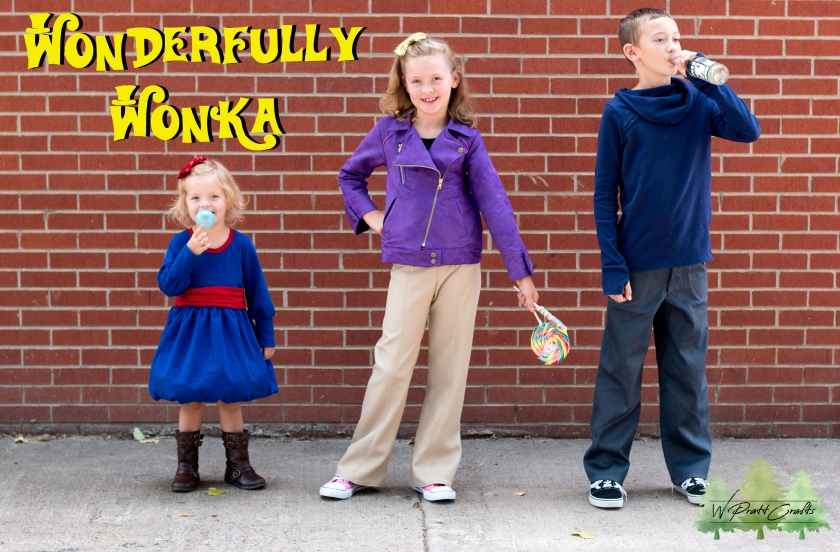
Once I heard that our first week’s theme was Willy Wonka, I knew our look wasn’t going to be complete without making sure we had a touch of the main man himself in it. I reinvented his classic suit jacket and pants into this self-drafted modern, purple suede moto jacket. I loved putting in the details such as the welt pockets, zippered breast pocket, and lots of snaps to create a fun and functional look.

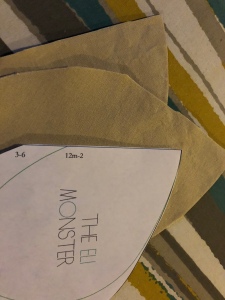
I paired the jacket with my new take on the Portlanders by New Horizons Designs. Instead of using knits, I altered the pattern to make our out of woven twill I purchased from Colorado Fabrics. Then, I eliminated the side seams of the pants to make way for contoured seaming along the front and back of the legs. Finally, I added back pockets because any good pair of pants needs some pockets.

And of course, you can’t be Wonka without adding a little (or giant) lollipop, right?

WW edits singles (14 of 34)

The next little lady in our set is our own Violet Beauregarde. I loved the idea of playing with volume for her look as a nod to her bloated blueberry state in the movie. I took the Grow Fonder pattern from Apple Tree Pattern Company and turned the shirt into a dress. The bubble hem along the bottom gives a fun, full look and to compliment the mini bishop sleeves I created by using the slash and spread technique. Lastly, I added a ruched sash and large bow in the back for a final touch of whimsy. I just love how this turned out and had just the right amount of added volume without overwhelming her small frame.

She was very excited to take photos that she (and I) didn’t pay attention to making sure her shoes were on the right feet… haha.

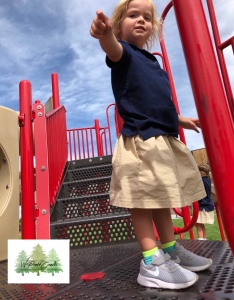
Finally, no story, or set, is complete without a hero. In our case, that hero is in the form of a modern Charlie Bucket. In the movie, this humble character wears a basic navy turtleneck and plain grey trousers. I wanted to keep the same color palette, but give his look a little more interest. I started his top using the Everette by Phat Quarters and added a cowled neckline in place of the standard V neck it is drafted with. I also added a couple of buttoned plackets to the neck and flank to add subtle detail to the look. Because who doesn’t love a good thumbhole, I kept those from the pattern to the great enjoyment of my Charlie.


He was also very excited to pose with some soda a la Charlie and his Fizzy Lifting Drink from the movie. He may not have flown like Charlie, but he definitely got a sugar high.

The shirt tops a pair of self-drafted front zipper fly pants, made from some grey stretch denim. The fit and fabric of these pants make for some comfortable bottoms for him. Being tall and slender, most pants are too large at the waist with the size he needs for the length. With these, he is able to forgo his usual belt. The front pockets have inset zippers to keep any treasures safe and sound, while the back pockets got some cool topstitching and rivets.

WW edits singles (20 of 34)

I’m so pleased with how our overall look came together, and I hope you enjoyed it too! Now you can head on over to the Willy Wonka post over at Project Run and Play, look at all the designer makes this week, then cast your vote at the bottom of the post here!

WW edits singles (31 of 34)

Thanks so much for reading and until next time, happy crafting!

Wendy

Back to School with the Schatje Skirt // The Eli Monster

This post contains affiliate links which allow us to receive a portion of any sales which use our link. Please contact us with any questions regarding these links, and thank you for your support!


5C9BE056-CC68-46AC-B73D-8AA856441243

It’s that time of year again. The time we send off the littles in our lives to attend various places of education and fun. This year was special in that our youngest gets to go too! I had thought I was going to miss out on the back to school sewing that I’ve seen around the interwebs lately since the school our kids attend require a uniform, including the preschool. But, after looking over the requirements for the preschool uniforms I found out that I can sneak a few mom-made pieces into her rotation.

9DDF74F9-58A2-4599-9706-DD4B4E9304DB

When looking for a pattern to use I found the Schatje Skirt by The Eli Monster (affiliate link). I fit the bill of being quick, cute, and uniform friendly. I had to sneak this skirt in between my Project Run and Play goodies (which you’ll get to see starting tomorrow!), which meant time was short. And I also realized little only had one pair of suitable bottoms to get her through the first week of school…

The pattern has three length options (knee, tea, and maxi) but easily lends itself to customization in length. I choose to add a little extra to the knee length to get a little longer wear out of it as she grows through the school year and still meets the uniform requirements. I love being able to customize each item I make specifically for the kiddo wearing them.

B4FEC37F-EA02-44D5-A816-945C6D131129

In this case, not only did I add a touch of length, but I was able to ensure little one had pockets (she loves pockets). Fortunately for me, pockets are included!

B120A639-D2E5-42CB-8238-A06438445B9F
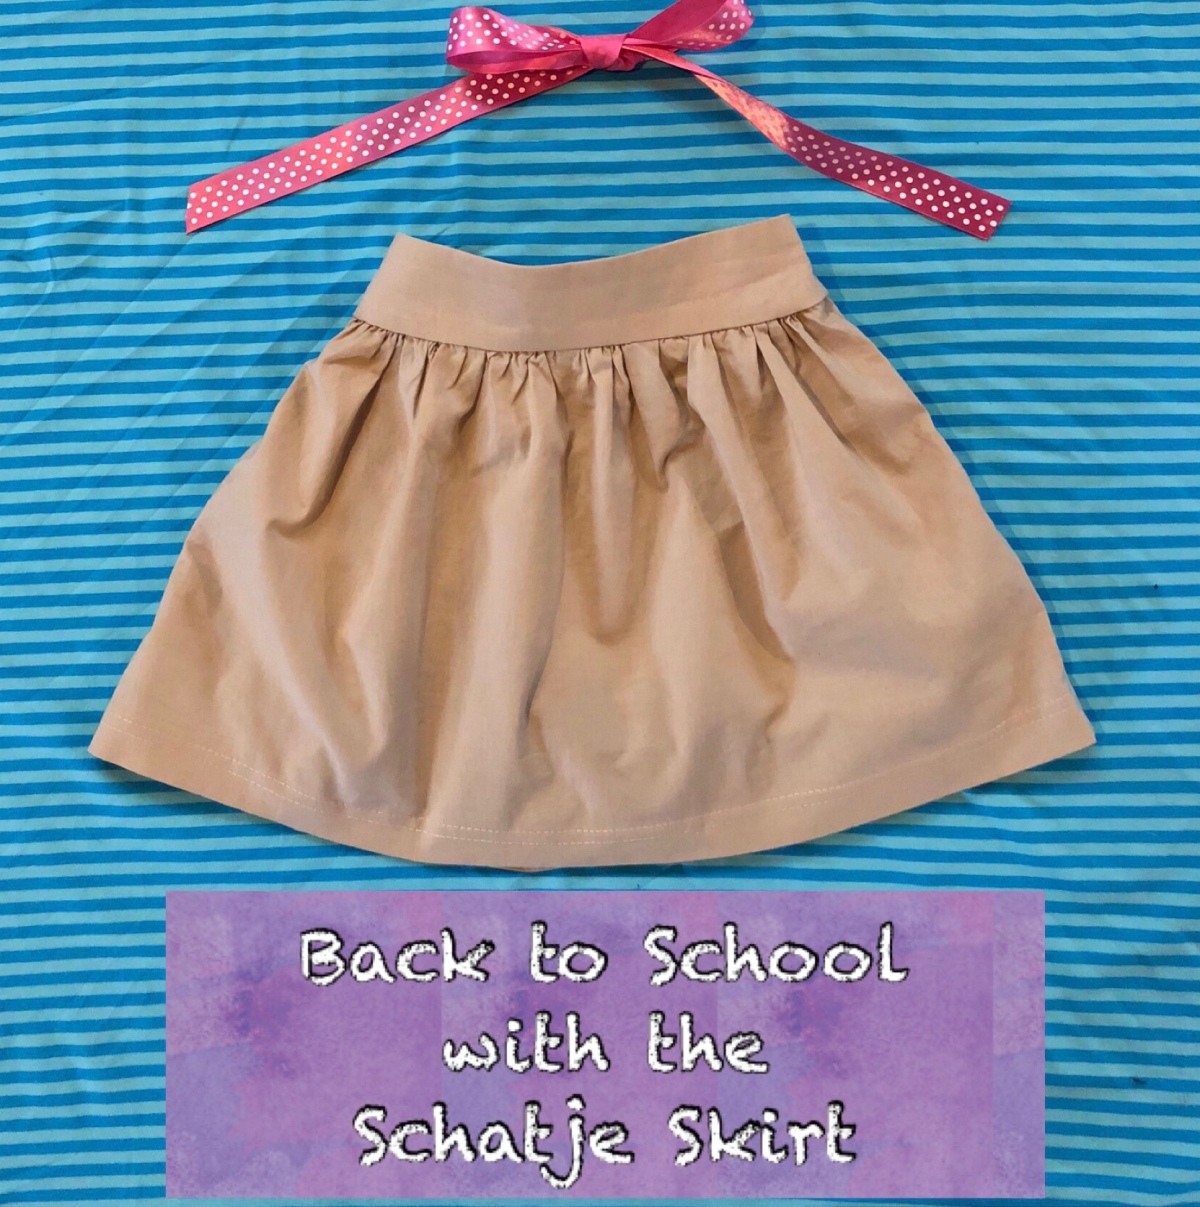
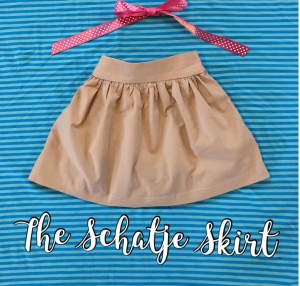
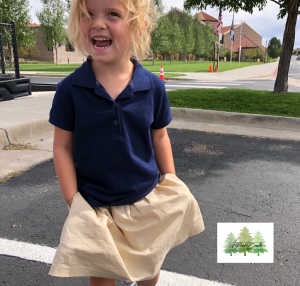
Another touch that I really like about this skirt is you get the comfort and ease of an elastic band, you get the crisp flat front of a fitted skirt.

Overall, the Schatje Skirt is a great beginner pattern that has clear instructions to guide you through each step. Plus, you only need to print a couple of pages to get what you need to make it, saving time and money in paper and ink.

Here’s a few photos of the Schatje Skirt out in the “wild” keeping up with little one on the playground.

Once life settles down a little I have a feeling that her big sister will be getting a maxi length skirt because the cover photo on this pattern just makes me want to make one!

DF59E52C-673F-4400-9B58-DBFE0D684DC0Who needs this pattern? You do!

Check out more lovely makes in The Eli Monster inspirations in their Facebook group here, and until next time, happy crafting!

Wendy

The Making of a Party Shirt (Part 2)

Today we pick up where we left of from The Making of a Party Shirt (Part 1).

Step 4: Prepare the sleeves before attaching them to the shirt body: attaching the placket.

Before attaching the sleeves to the shirt body, you will reattach the placket. Many times you will be able to remove the placket and keep the button in place, but you may find it easier to sew if you remove the button and replace it after the placket is sewn down. There are a few types of plackets so this is where any photos you took while disassembling will come in handy.

To reattach my plackets, I first cut out a Y shape in my new fabric based on the original sleeves.

816C6B86-92BB-4AB6-9ECF-10FB526E55D7

Then I take the placket and sandwich my new fabric between the placket layers. The Y shape allows me to pull the fabric into a straight line and line it up with the placket. Pins will be your friend in this step, especially around the top of the Y shape, to ensure that you catch enough of the new fabric between the placket.

It’s also important to be sure the center of the fabric (the triangle wedge you see on the right) is lined up in the center of the placket where it naturally wants to fold to its original shape. Once you have the placket pinned into place, topstitch it down following the original seam holes or as close to the edge as you can, while ensuring you’ve caught all layers.

After the placket is attached, follow the original creases and fold the placket into shape. Pin in place, then topstitch the fold down following the original markings.

Repeat for the opposite sleeve, then they are ready to attach to the shirt.

Step 5: Attaching the sleeve to the shirt body.

Making sure the right sleeve is attached to the right side, pin the shirt sleeve to the main body, easing in the shoulder area as needed. I use a 3/8″ seam allowance and then finish my seam with a serger. You can also use a zig zag stitch to finish the seam to keep the edges neat. Finally, I topstitch along the outside of the seam to help the seam lie flat when worn by pressing the seam allowance towards the shirt body. Repeat for opposite side.

Step 6: Sew up the side seams.

After the sleeves are attached, sew the shirt front and back and shirt sleeves along the sides. As before, after stitching them together, finish your seams with your method of choice (e.g. serger or zig zag stitching).

33D57F4D-088F-4362-B3E1-EC692C3F129A

Step 7: Attach the cuffs.

Most sleeves will have a number of pleats at the cuff to help fit the fullness of the sleeve into the cuff. Use the original sleeves to mark out where your pleats should be in your new sleeves. Press the pleats and pin in place.

After the pleats are set, place the edge of the sleeve between the layers of the cuff. **Note: you may need to adjust your pleats slightly to fit your cuff.

When the cuff is in place and the pleats are set, topstitch the cuff into place making sure to back stitch at the beginning and the end of the cuff to secure it into place.

Step 8: Hem the shirt.

This is where the optional rolled hem foot comes in handy. Most dress shirts that I have found use a rolled hem along the bottom. If you aren’t familiar with a rolled foot, check out my previous post on how to use one here. If you do not have a rolled hem foot, you can make a narrow hem by folding the fabric over 1/4″, two times and stitching into place.

Here is how I use the rolled hem foot for my shirts.

Begin by using the existing fold from the original shirt front to begin your roll. Feed the rolling fabric into the sewing foot. Once the fabric is in place, put your foot down and begin stitching, guiding the fabric as you go. The foot should fold up the fabric for you, creating an even hem along the bottom.

After you’ve stitched the length of the hem and you are close to the original shirt hem, stop, place your needle down to hold the fabric into place, then remove the fabric from the foot. Place your foot back down, then finish off the hem, going slightly into the original hem to secure the ends.

If you find that not all of your fabric edges get caught in your rolled hem, especially at the beginning or the end, use a little fray check to seal the edges.

And that’s it! You’ve made a party shirt!

As usual, thanks for reading along, and please let me know if you have any questions or comments below.

Until next time, happy crafting!

Wendy

The Making of a Party Shirt (Part 1)

AF25E1B7-7C3B-4532-A95A-0A088CE229E3

What if I told you all of these fine upstanding young gentlemen had a secret? Would you be able to guess what it was? If you’ve read the title, or heard of a party shirt before you’re probably already two steps ahead of me.

What you can’t see under their jackets are these:
157EFA22-4048-4998-AFCD-72C3A59D6E52

A couple years ago, I made a handful of these special party shirts for my cousin’s wedding. What is a party shirt? It’s a button down shirt that’s been transformed by changing out the sleeves and/or the back to have a fun an unique look once the jackets are removed and the party begins. During the ceremony, the guests were unaware that there was anything unusual about the groom and his men’s attire. But they were all in for a special treat once the reception began!

Party shirts are also very common in the military community to be worn to formal functions. With their jackets, they look the part of the formal uniform, but once the dancing begins the jackets come off and the party begins.

Recently the couple requested one last shirt to give to a friend, and since I had some extra time and no pressure of a looming wedding date, I documented the process to share this tutorial with you.

Supplies needed in addition to a sewing machine:

  • a long sleeve button down shirt/mess dress shirt (military)
  • 2 yards of similar weight/feel fabric as the shirt you are using (I most commonly use cotton or quilters cotton)
    • 1 yard for the sleeves
    • 1 yard for the back
  • coordinating thread
  • scissors
  • pins or clips
  • (optional) rolled hem foot

Let’s begin!

Step 1: Disassembling the shirt.

Generally, the process is the same for any shirt. Begin with removing the side seams of the shirt, up through the arms until you reach the cuff. Then you remove the sleeves from the body of the shirt. Then remove the back from the yoke. Then you can remove the cuffs and plackets from the sleeves.

Many shirts have two layers of stitching to be removed before a seam can be separated. Often times, one of these layers is a single coverstitch. These can be easily removed if you know how to pull them out. To check if you have a coverstitch row to remove, look for stitching like this:

The left side is the side you want to work with, the bottom side of the stitching, which looks like connected chains. The right side (the top side of the stitching) looks like regular straight stitching. Once you find the correct side, you should be able to cut the bottom (looper) thread and have it easily pull and unravel itself. If it doesn’t pull and unravel easily, try starting at the opposite end of the seam. (For video demonstration of this, check out this YouTube video.)

Be sure to label each of your pieces so you know which sleeve cuff belongs to which side and which side is the right and wrong sides of all the pieces. **Tip: if your shirt is not exactly like the one I use in this tutorial, or just for future reference when assembling the new pieces, take your own photos as you disassemble the shirt so you can see how to reconstruct it later on. This is especially helpful with the plackets on the sleeves.

Set aside the cuffs, plackets, and shirt front with collar until you are ready to reassemble. I typically keep one sleeve cuff and placket intact until I am ready to use those pieces so I can keep track of which cuff belongs to which side and use the other disassembled sleeve as my pattern piece for both sides.

Step 2: Cut your new shirt pieces from your party fabric.

Take the back piece and one of the shirt sleeves and lay them out on your fabric, using them as your pattern pieces. You will need one new back piece, and two sleeves (mirrored).

67635238-8AD6-46F3-BA10-5EE73F169D37
When cutting out the back piece, I do not remove the hem in the back, and instead add approximately an extra 1/2″ to the bottom of my new back piece to accommodate the hem in a later step. You may choose to undo the hem if you wish and cut it as an exact piece, but I have found it to be a time-saver to skip that step and add length when cutting.

Step 3: Begin reassembly by attaching the new back to the shirt front.

Start by marking the center of the new shirt back, and align it to the center back of the yoke. Once you have the centers lined up, pin the back between the layers of the yoke making sure the top and bottom pieces are lined up.

37B91A00-4B43-4D10-A777-2040B488CD02

Once you have the new back pinned in place, topstitch along the yoke to secure the back in place, using the previous holes from the original seam as a guide.

With the back in place, you’re ready to begin reassembling the sleeves, which we will resume in The Making of a Party Shirt (Part 2).

Let me know if you have any questions or concerns in the comments below!

Until next time, happy crafting!

Wendy

Mayfair // New Horizons Designs

Please note: this post contains affiliate links noted by (aff) following the link. If you use this link to make a purchase, it will not cost you anything extra, but I would receive a small commission on the sale. Thank you for visiting and enjoy the post!

When many hear New Horizons Designs (aff) they instantly think of Portlanders, Tamis, or one of their new summer releases this year like the Marabelle or the Cascade. But let me take you back a bit and re-introduce you to the Mayfair.

This layered PDF pattern can be used to make sweet tops or dresses, with cute optional ruffle details. On a recent shopping trip I lucked out and scored some wonderful lace trimmed fabric for only $5 on clearance. It was pretty thin so I grabbed a lining fabric and some additional striped cream and white for the front accent piece. With the details of the lace edge, I knew I wanted to keep our colors neutral to let the lace and the design details shine through. IMG_4938

I made sure to make the most of the lace by modifying the sleeve slightly to use the scalloped edge along the hem.IMG_4942 
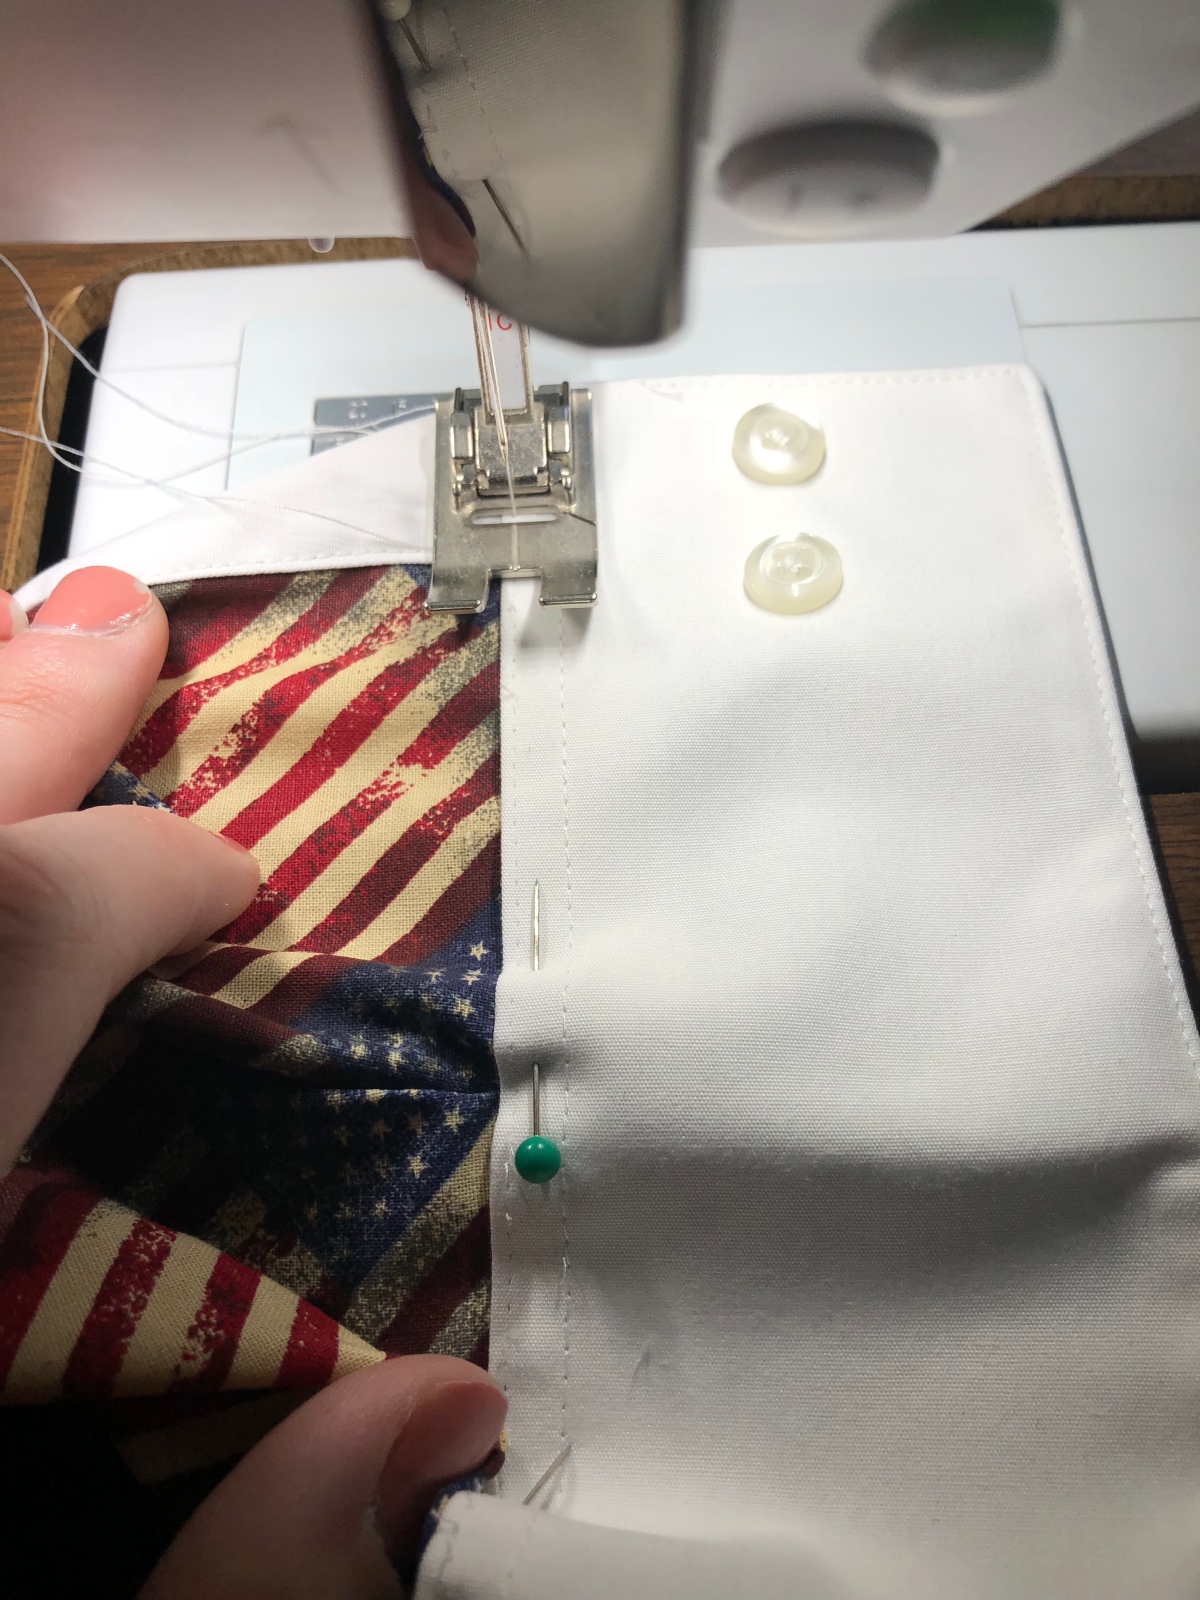
I was fortunate enough to have snagged plenty of the lace trimmed fabric, that I had enough to make matching sister dresses!

Once all my pieces were cut, it was time to get busy sewing.

The instructions and illustrations included with the Mayfair made assembly easy. The trickiest bit, not surprisingly, was getting all the buttonholes lined up and in place. But with a little practice and patience, it’s doable and very worth it once you start seeing it all come together.

Let me tell you, I was getting so excited seeing this all come together. This simple and sweet look was capturing my heart. I couldn’t wait to see the girls in them. I did add a couple of modifications, I added length to both the size 7 and size 3 so they were a bit longer than the pattern calls for, based on personal preference. And I added a simple set of ribbon ties to the back to add a small detail and to help contain some of the flow.

So now, without further ado… here are our completed Mayfair Dresses…

Thanks for reading along and please let us know what you think!

Until next time, happy crafting!

Wendy

Ring Around the Rosie // Puzzle Patterns

A while back, a friend and I went searching for the perfect fabrics to make a dress for her daughter to wear to a Father/Daughter Dance. Unsurprisingly, we also found fabrics for additional projects while we were there. She decided that she wanted matching dresses for her daughter and her niece.

After we got settled from our move, it was time to get started on the dresses. I raided my pattern stash in search of a woven pattern that would accommodate both a size 5/6 and an infant, given that her niece is 10/11 months old. I was so excited to see that she just fit into the sizing for Puzzle Pattern’s Ring Around the Rosie pattern, so I got to work.

If you haven’t heard of Puzzle Patterns or never tried them yet, they have a whole collection for wovens called the Playtime Collection. The awesome thing about all the patterns within the collection is that all of the pieces can be mixed and matched with any of the other patterns! I used a little of each of them to create this outfit for my littlest last fall.
IMG-9779

For these dresses I decided to use all pieces within the Ring Around the Rosie pattern. My pup decided she made a good pattern weight and “helped” me get started cutting and prepping the fabrics.

IMG_5109

I recently received an embroidery machine for my birthday and knew this pattern would be a great excuse to put it to work. I love how the added stitching helped tie in the colors of the skirt onto to the bodice, and the ruffles added a touch of girlie fun to the whole look.

The back straps cross behind and attach to the skirt with a couple of hidden buttons. I pulled out an old tip I learned to use a straight pin to act as a “bumper” if you will, so when I used my seam ripper to open them up, I didn’t go too far and ruin my buttonhole. (Trust me, you don’t want to have to debate with yourself on how to fix it or if you should just start over.) 

IMG_5135

And there you have it, two adorable Ring Around the Rosies, ready to get sent off to two adorable little ladies.

I can’t wait to hear what their mamas think! Let me know what you think, or what Puzzle Pattern you’ve tried or would like to, in the comments below.

Until next time, happy crafting!

Wendy

Rolling with The Wolf and The Tree

Once upon a time there was an aunt who loved making things for her nieces for their birthdays and they loved getting handmade goodies. Then one day that same aunt had to move and didn’t get to make anything until 2 months after a birthday… Confession time. I am that aunt (if you didn’t already guess)… Fortunately this aunt has amazing nieces that are old enough to understand and forgive her for the delay.

Fortunately as well, the same aunt discovered the perfect pattern to use that was not only quick but super fashionable for the tween she was sewing for. I used the River Romper by The Wolf and the Tree patterns. As I mentioned already, this pattern came together very quickly. It also allowed me to use one of my favorite sewing feet, the rolled hem foot. This bad boy is a life saver when it comes to hemming delicate fabrics or putting in a narrow hem.


For this romper I used a stretch crepe woven in a beautiful tealish blue.

Below I have a quick and dirty photo series on how I use this foot to make hemming a lot easier:

I start by folding the very start of my hem twice and secure it with a pin.

Then I place that folded and pinned section under my foot, once the foot is set down into place, keeping my fabric folded still, I remove the pin and make a few stitches to secure the fold. My folding the beginning portion of your hem edge it helps encourage the following sections to roll over and is a key to using this foot.

(This is the dirty part of the tutorial, I definitely need to de-lint my machine! Oops!)

Next I place my needle down to hold the fabric into place, then lift my foot up.

IMG_5066

I then take the edge of the fabric and slide it into the foot so that it begins to roll on its own within the foot.

Once the fabric is settled into the foot, I lower the foot and then I’m ready to roll… 😉

The trickiest parts of getting used to a rolled foot, is getting it started and then keeping your edge fed consistently within the foot as you sew. Circle skirts or curved hems are so much easier with a rolled foot, but you do need to watch your edges as they feed in to keep it all on track.

But once you feel comfortable with this foot, you’ll find yourself using it as a go-to attachment for many of your projects. I used it to hem the sleeves, shorts, and the skirt overlay on this romper. I love the clean look it gives it, and the stretch in the material added a slight wave to it. Most of the time you want to avoid wavy hems or edges, but I actually love the way it adds a little swing and movement to the edges of this.

I can’t wait to send this off to my niece and I hope you enjoyed reading about it. Let me know if you have any questions or if you have your own tips and tricks when using this foot in the comments below.

IMG_5082

Until next time, happy crafting!

Wendy

Season 17 Here I Come!

Please note: this post contains affiliate links noted by (aff) following the link. If you use this link to make a purchase, it will not cost you anything extra, but I would receive a small commission on the sale. Thank you for visiting and enjoy the post!

As a crafter and seamstress I have been looking for ways to continue to learn and challenge myself. I had heard of the blog Project Run and Play a while back and enjoyed following along and seeing the incredible makes the designers crank out each week according to the weekly themes. I had never given it much thought about throwing my hat in the ring, because I was still new to the online sewing world and still getting my feet wet as a home sewist.

I have had the pleasure to work with the talented Gemia from Phat Quarters and then had the joy to watch her compete and earn herself a spot in the finals of Project Run and Play! As I watched her compete I started to look more into the competition and learned of their at-home portion. Each week as the designers compete, anyone can follow along at home for a chance to win some cool prizes. Plus, the winner of the final week not only wins the weekly prizes, but they also get to be a designer on the next season!

I finally decided to jump with both feet in and submitted a link-up as an audition using the bomber jacket I made my son earlier in the year. I was so hopeful and excited at the idea of getting to participate. Then the results came out!

P51 Promo (6 of 7)

Pattern: P51 Flyer by New Horizons Designs // Fabric: Faux Stretch Leather from Mood

I didn’t make it.

Another talented seamstress won the spot. Not to worry I told myself, it was probably for the best, as we had a move across state lines coming up and the timing wouldn’t have been great. But man, I was so hoping it would have been me.

After dusting my ego off, I decided that even though I wasn’t going to be designing for the next season, I was going to try again and this time follow along more closely to the weekly at-home portion of the competition. So in between moving prep and kid wrangling I made a couple of outfits to fit the themes.

Week 1’s theme was Circus so I created this peplum vest using some cool maroon vinyl and some vintage inspired clasps.

Week 3’s theme was Stripe week, and I used all my stripe matching abilities to create this chevron front sun dress with a full circle skirt using some striped French Terry from Aurora Design Fabrics (aff).

And our look won stripe week!

But the final week was for all the marbles. I wrote a blog about creating this moto inspired hoodie for my daughter.

DDGG 12 (1 of 1)
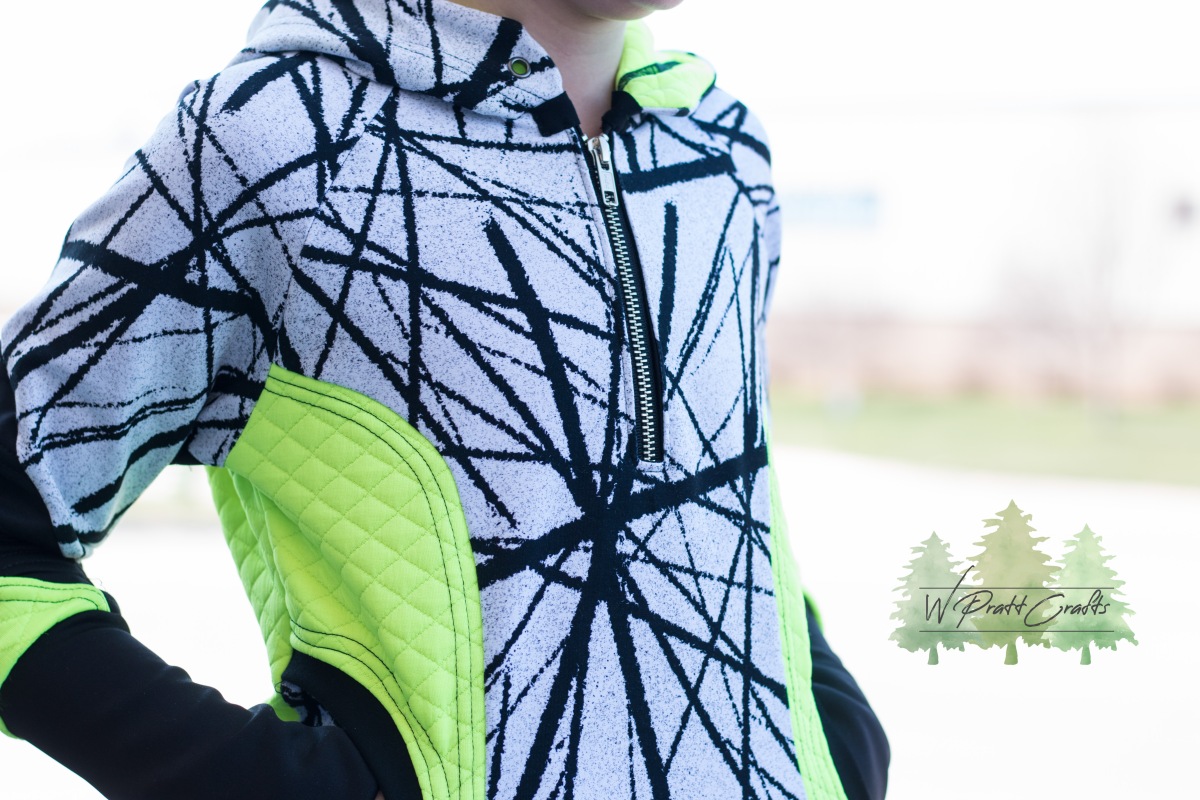
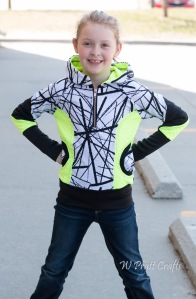
Pattern: Big Kid Bunny Hug by Apple Tree Sewing Patterns (heavily modified) // Fabrics: Aurora Designs and Dicarpo Designs

You can read the blog here.

Then the results came in…


We did it! I am thrilled to announce that I will be a designer on Season 17 of Project Run and Play! Stay tuned for more details and excuse me while I go celebrate!

Until next time, happy crafting!

Wendy

The Online Journey Begins…

Welcome to the newly minted W Pratt Crafts blog!

I’ve been kicking around the idea of creating a blog for a while, and now I feel ready to take the plunge and share my creative passions in a new format.

I have been sewing and crafting since childhood, and in the past couple of years my passion for handmade creations has exploded. Getting connected with other makers online and being inspired by so many wonderful creations has led me to develop a new love and sense of appreciation for sewing in particular. It has also lead to a decent hoard of fabrics.Deer Creek 2 (1 of 1)

(Dress Pattern: Modified Deer Creek Tunic and Dress by New Horizons Designs // Fabric from Knitpop)

My hope for this blog is to share and inspire other crafters in their own journeys so that we can all continue to learn and grow our talents.

Thanks for reading along, and stay tuned for more posts in the future!

Until next time, happy crafting!

Wendy

Design a site like this with WordPress.com
Get started